To manage the DHCP server settings, follow the steps in this article. DHCP can only be disabled by placing the AmpliFi router in bridge mode. Please make sure to read that article carefully before deciding to enable bridge mode. The process described below is applicable to all router models (HD, Instant, Gamer's Edition, and Alien), and explains how to edit DHCP settings to do things such as:
- Change the router's IP Address (LAN IP Address). This is done by changing the IP range. More on this below.
- Set the range of IP addresses that your devices will be able to connect to. To view what specific IP Address from the range your device has been assigned, go to Family Tab > Tap your device (visible on the Connected Devices list) > Tap Client Details> IP address.
- Correct the IP range if your devices are having IP address issues. See more about that in the Troubleshooting section below.
- Assign a Static IP. This can be done from the app's DHCP section, but is explained in more detail in this article: Creating a Static Lease.
How to Access the DHCP Settings and Configure an IP Address Range
1. Open the AmpliFi app.
2. Select the AmpliFi router icon.
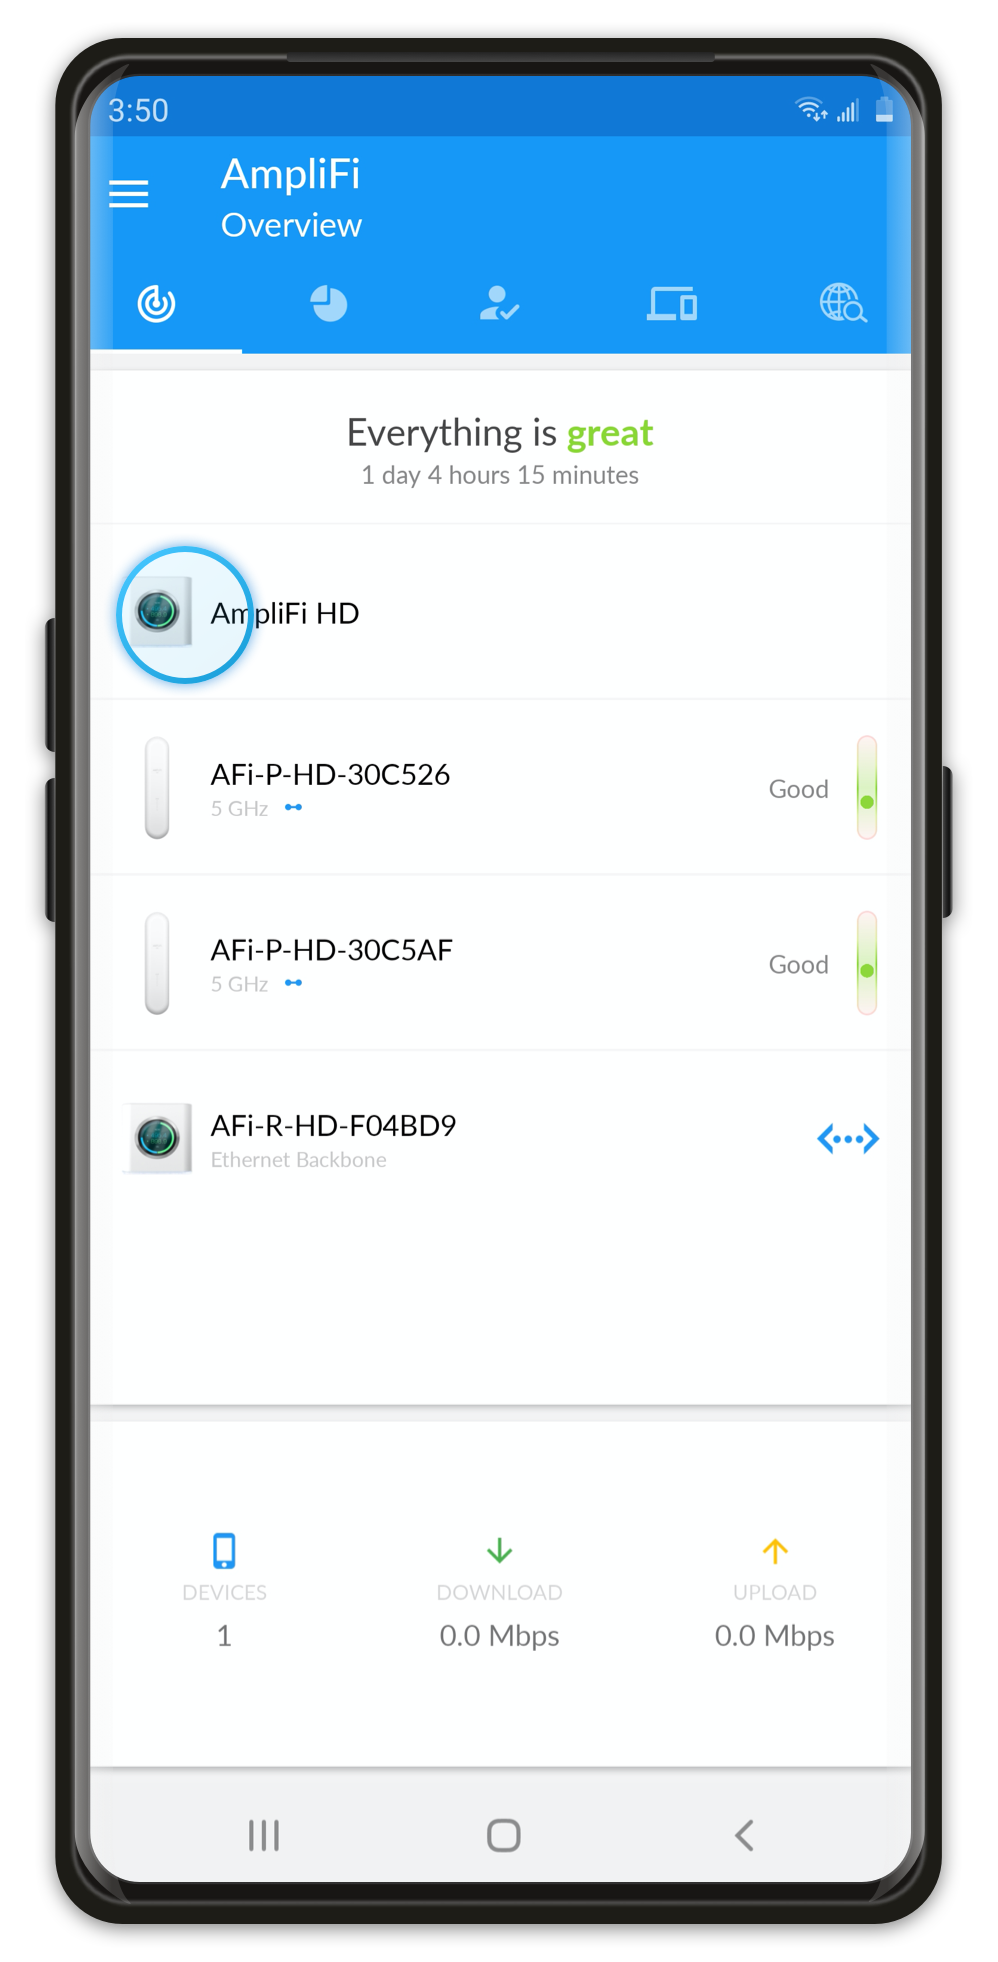
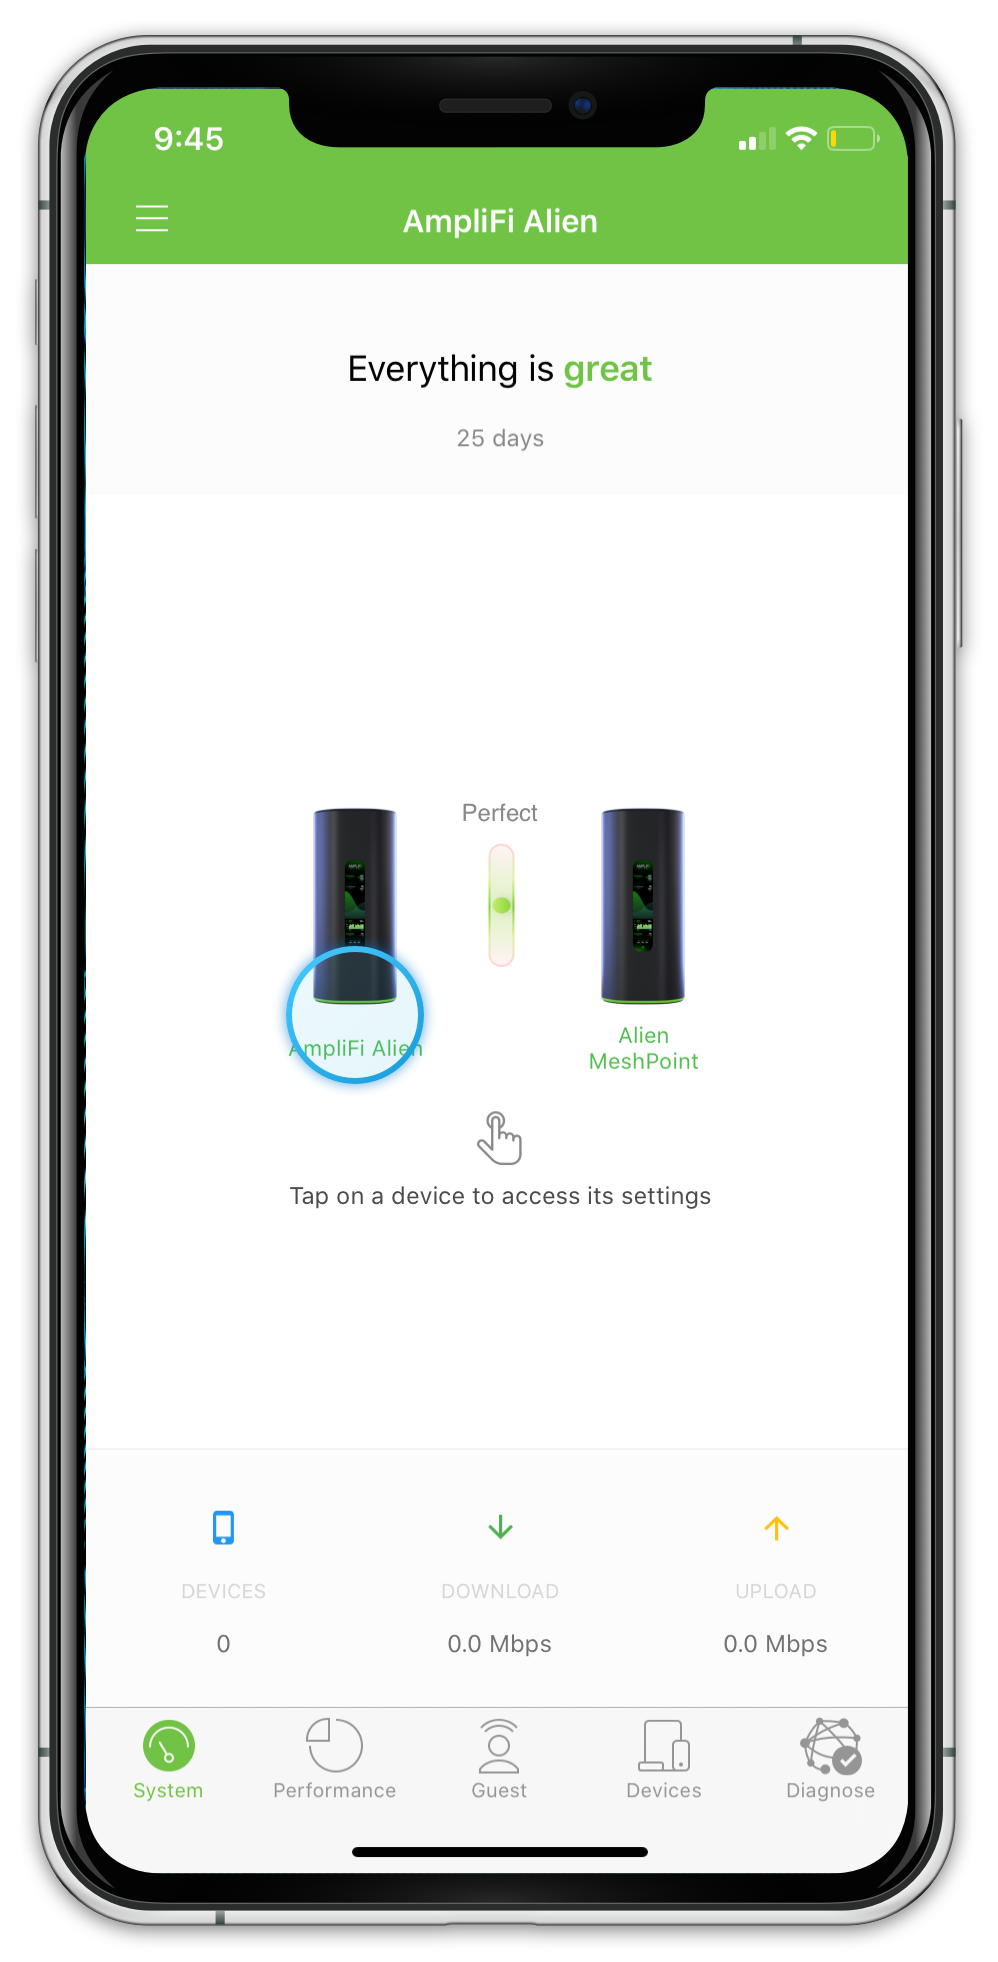
3. Scroll down and under the Advanced header, select DHCP Server.
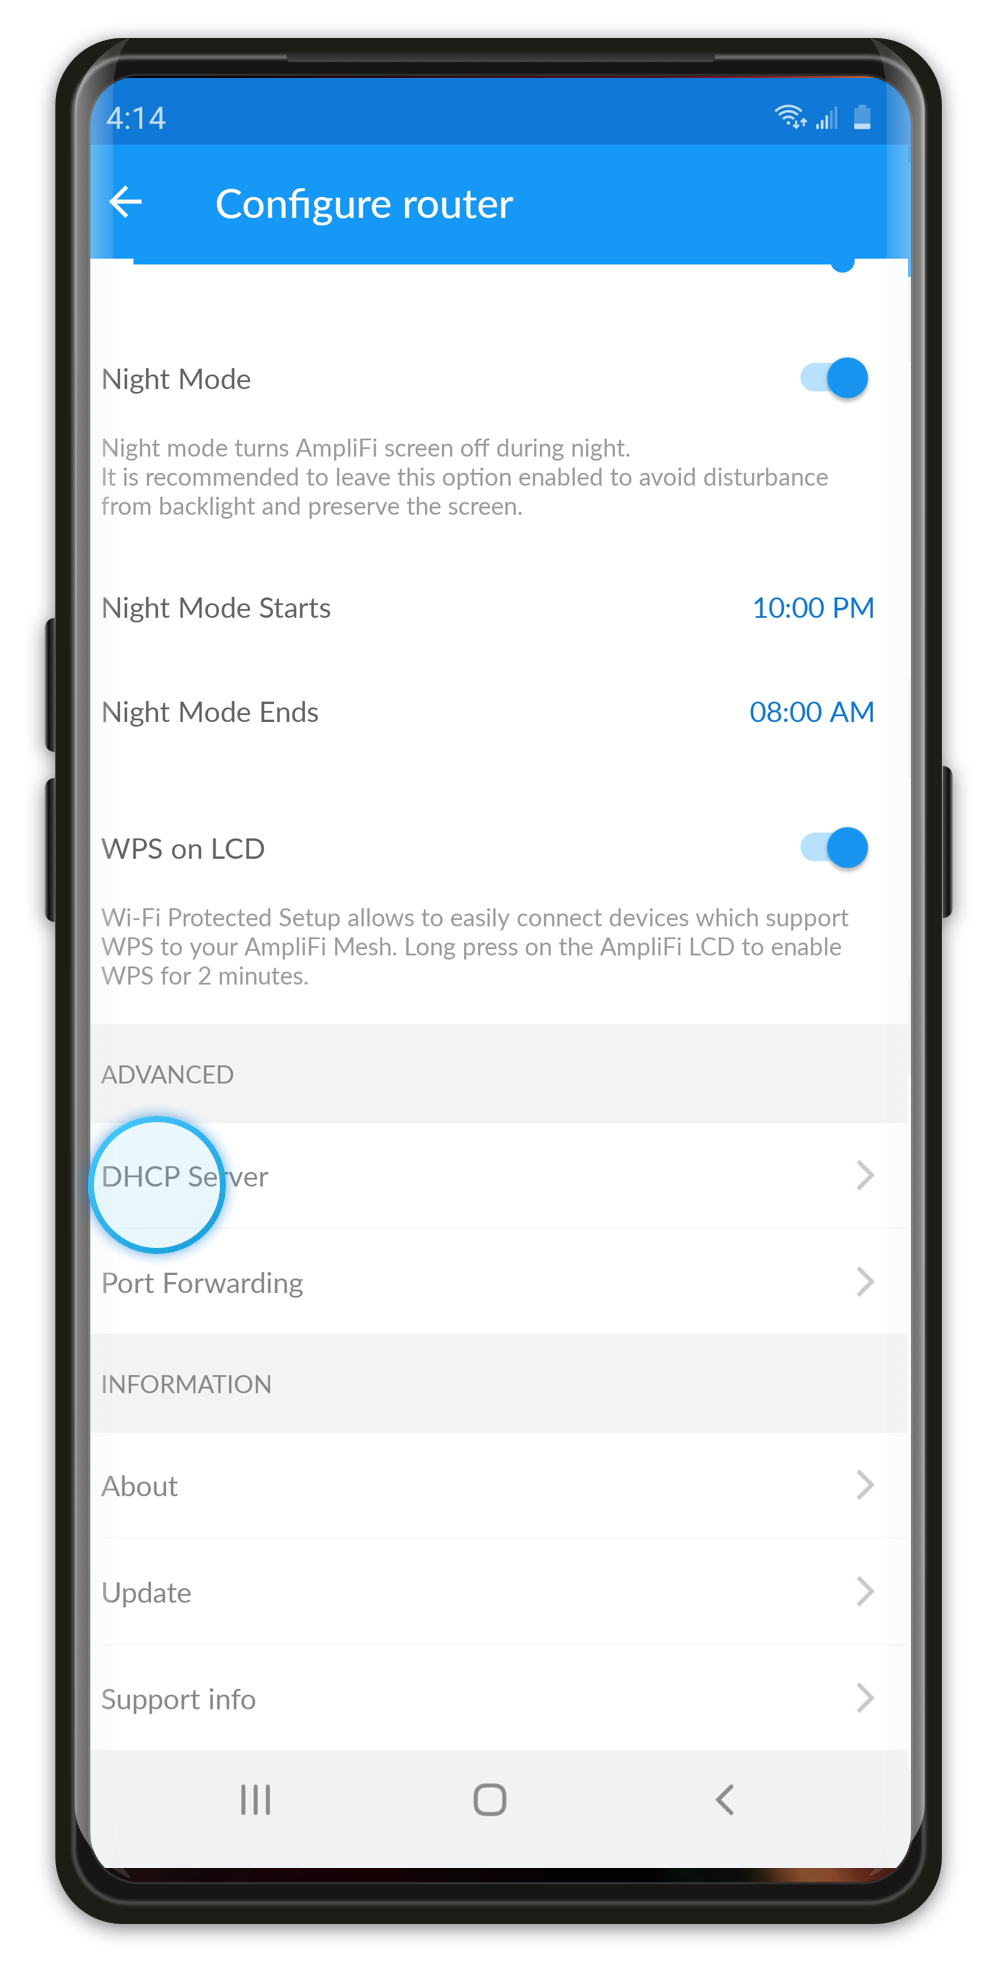
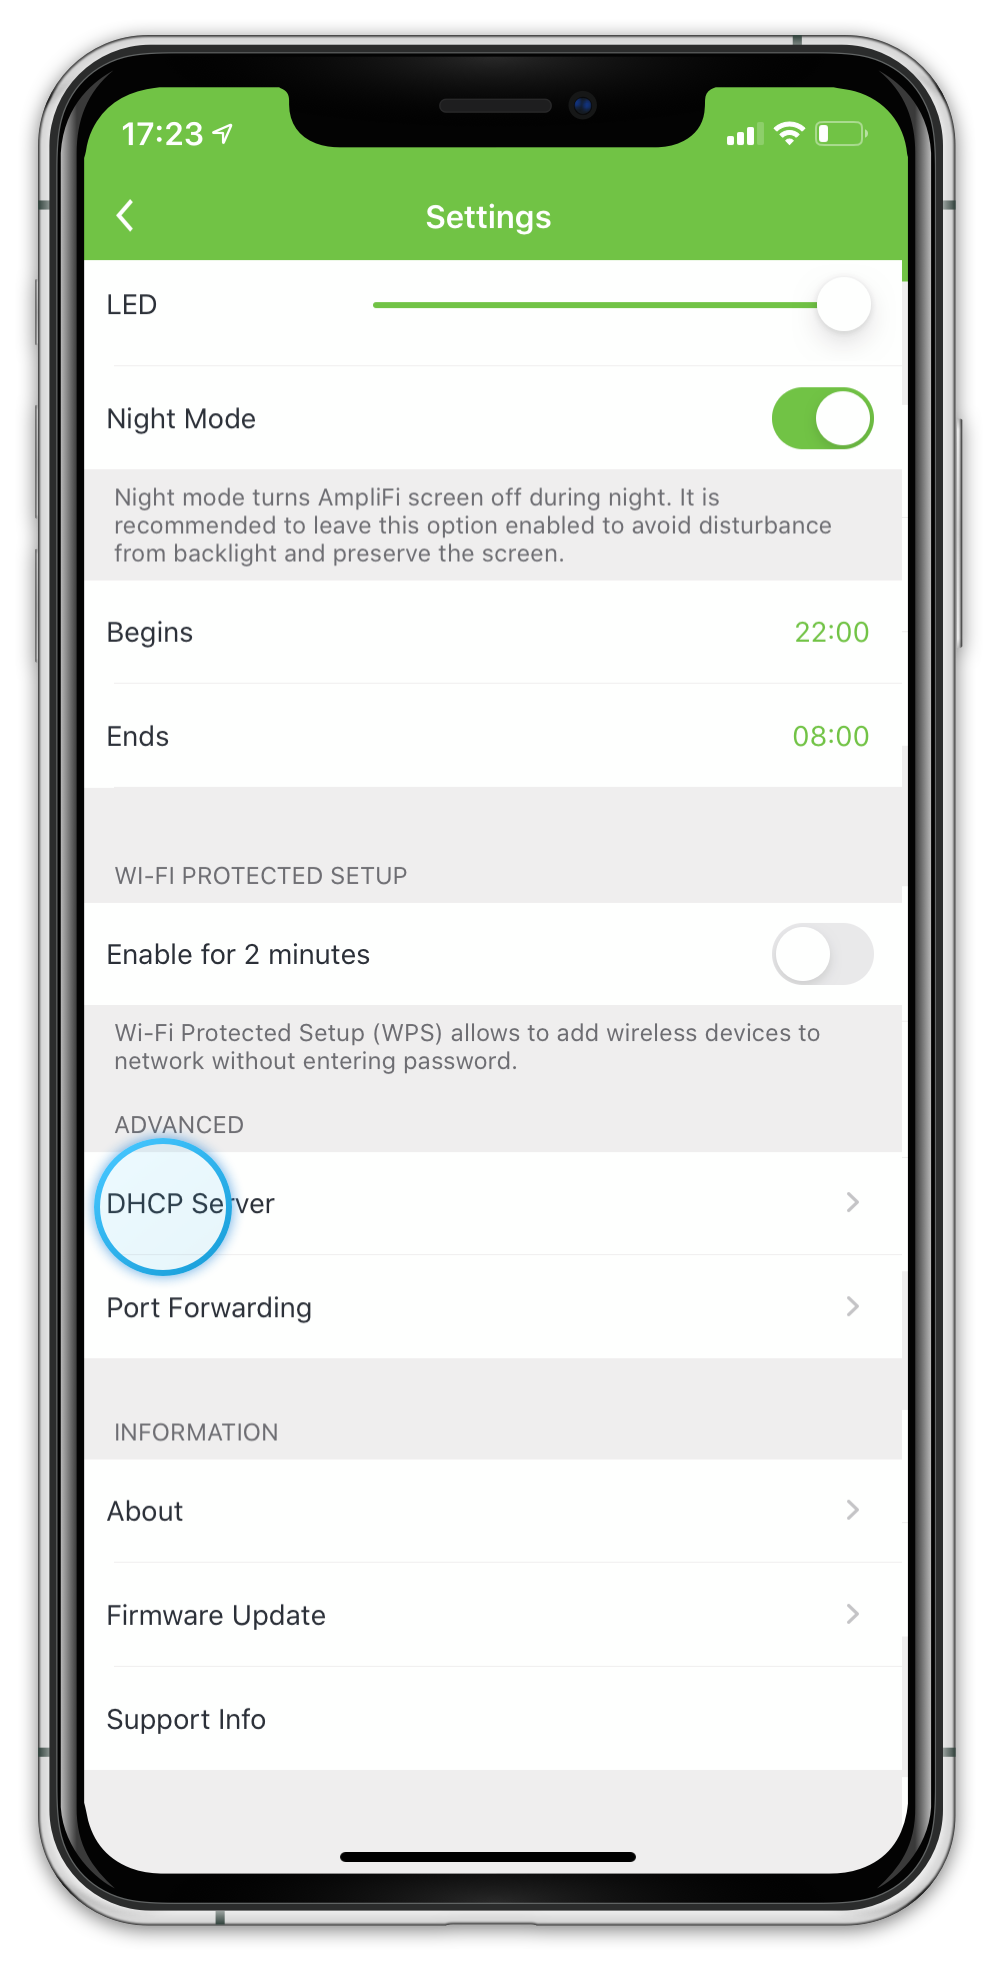
4. The Android and iOS app show these settings in a slightly different way, iOS will have the following options to be selected separately, while on Android type out the full IP Address that starts the range of assignable IP Addresses and the IP Address that ends the range (in other words, the first and last). iOS describes each portion of the IP range is the following:
- Range: Select the IP address range to use. On the Android app, these are the first two octets. Note that you must use one of the three ranges shown in the note of that screen. Those are the same three that are given as an option to be selected in the iOS app: 10.0, 172.16 and 192.168.
- Subnet: Select the third octet in the IP address. For example 192.168.X.1, where X is the subnet.
Important Do not confuse subnet mask with the "subnet" mentioned here. The LAN default subnet mask is 255.255.255.0 and cannot be changed.
- Start: The start and end will be the fourth octet in the IP address. The start and end of the range cannot be the same, and it cannot be 1 because this is reserved for the router's LAN IP address. For example 192.168.153.X where X is the fourth octet.
- End: Enter the fourth octet for the IP address that will be the end of the array of IP addresses possible for allocation.
- Lease Validity: Select the duration of time for which IP addresses are valid.
- Static Leases: Through DHCP, AmpliFi assigns IP addresses automatically.
For certain devices, it may be useful to assign them a static IP address. See this article to learn how to assign static leases.
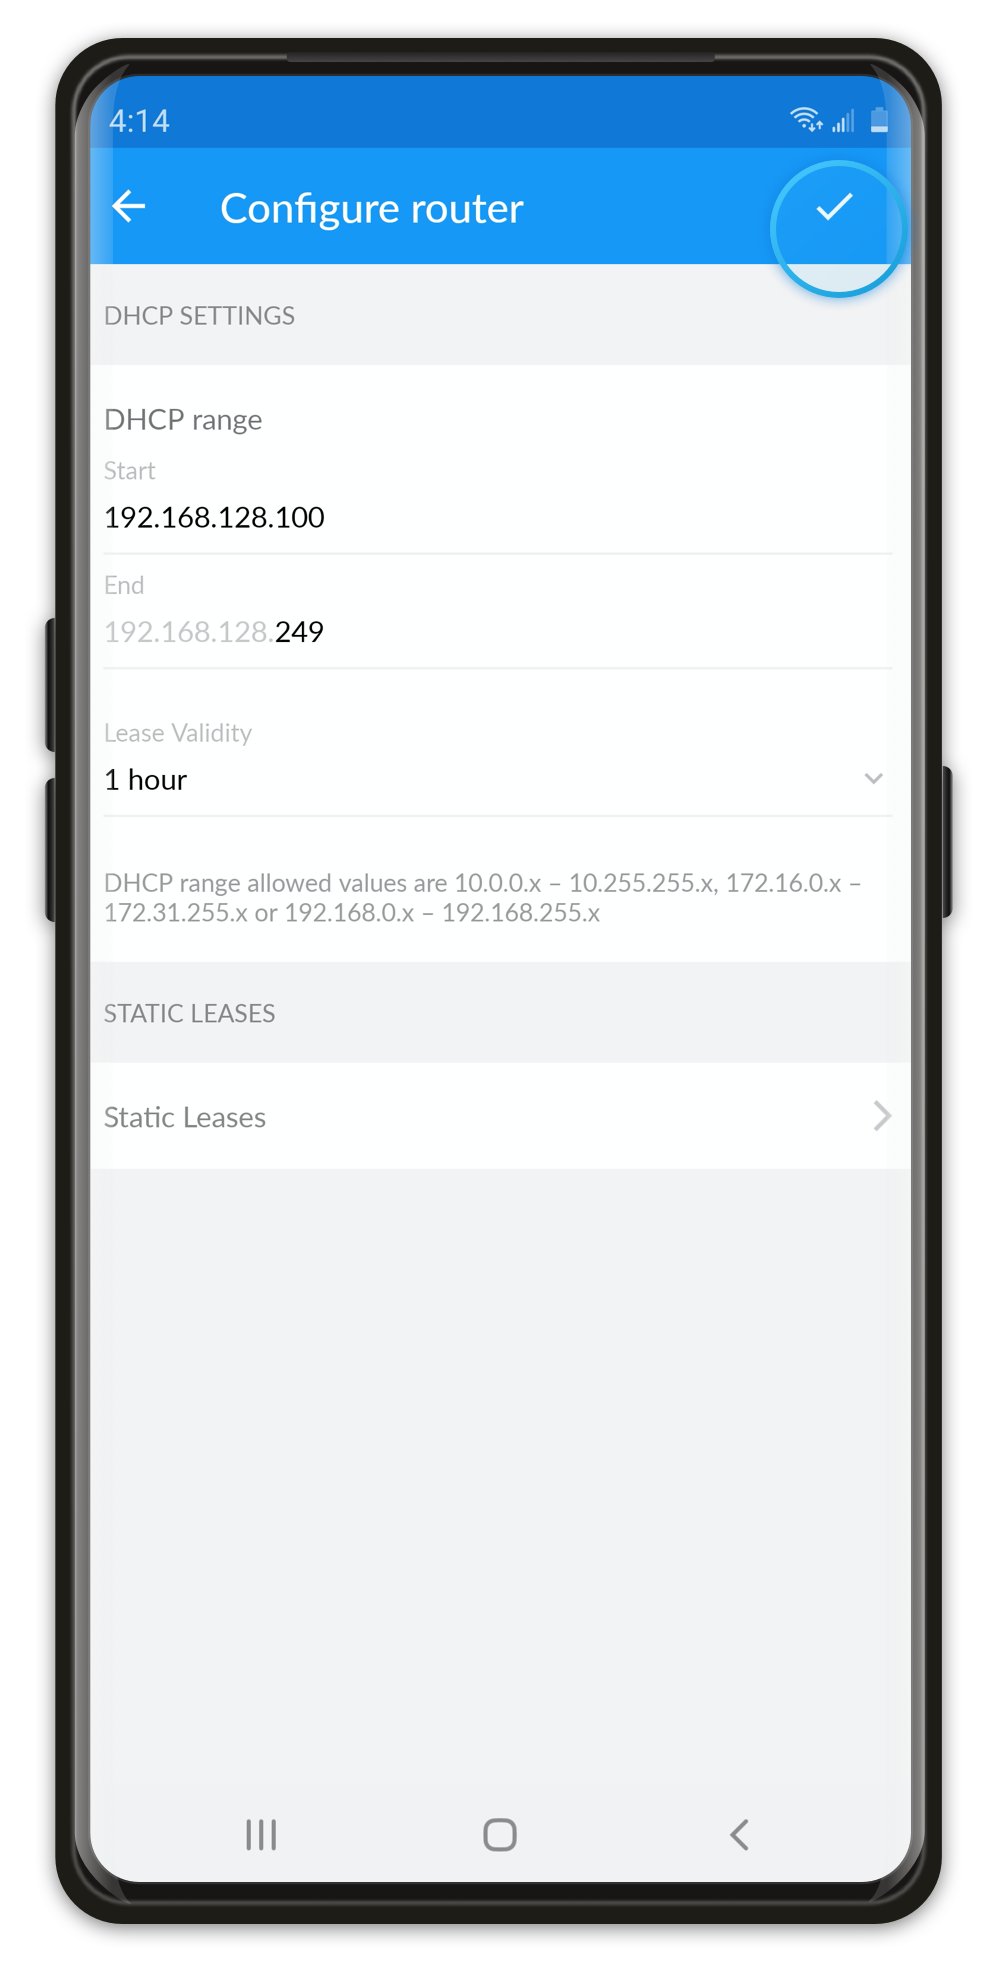
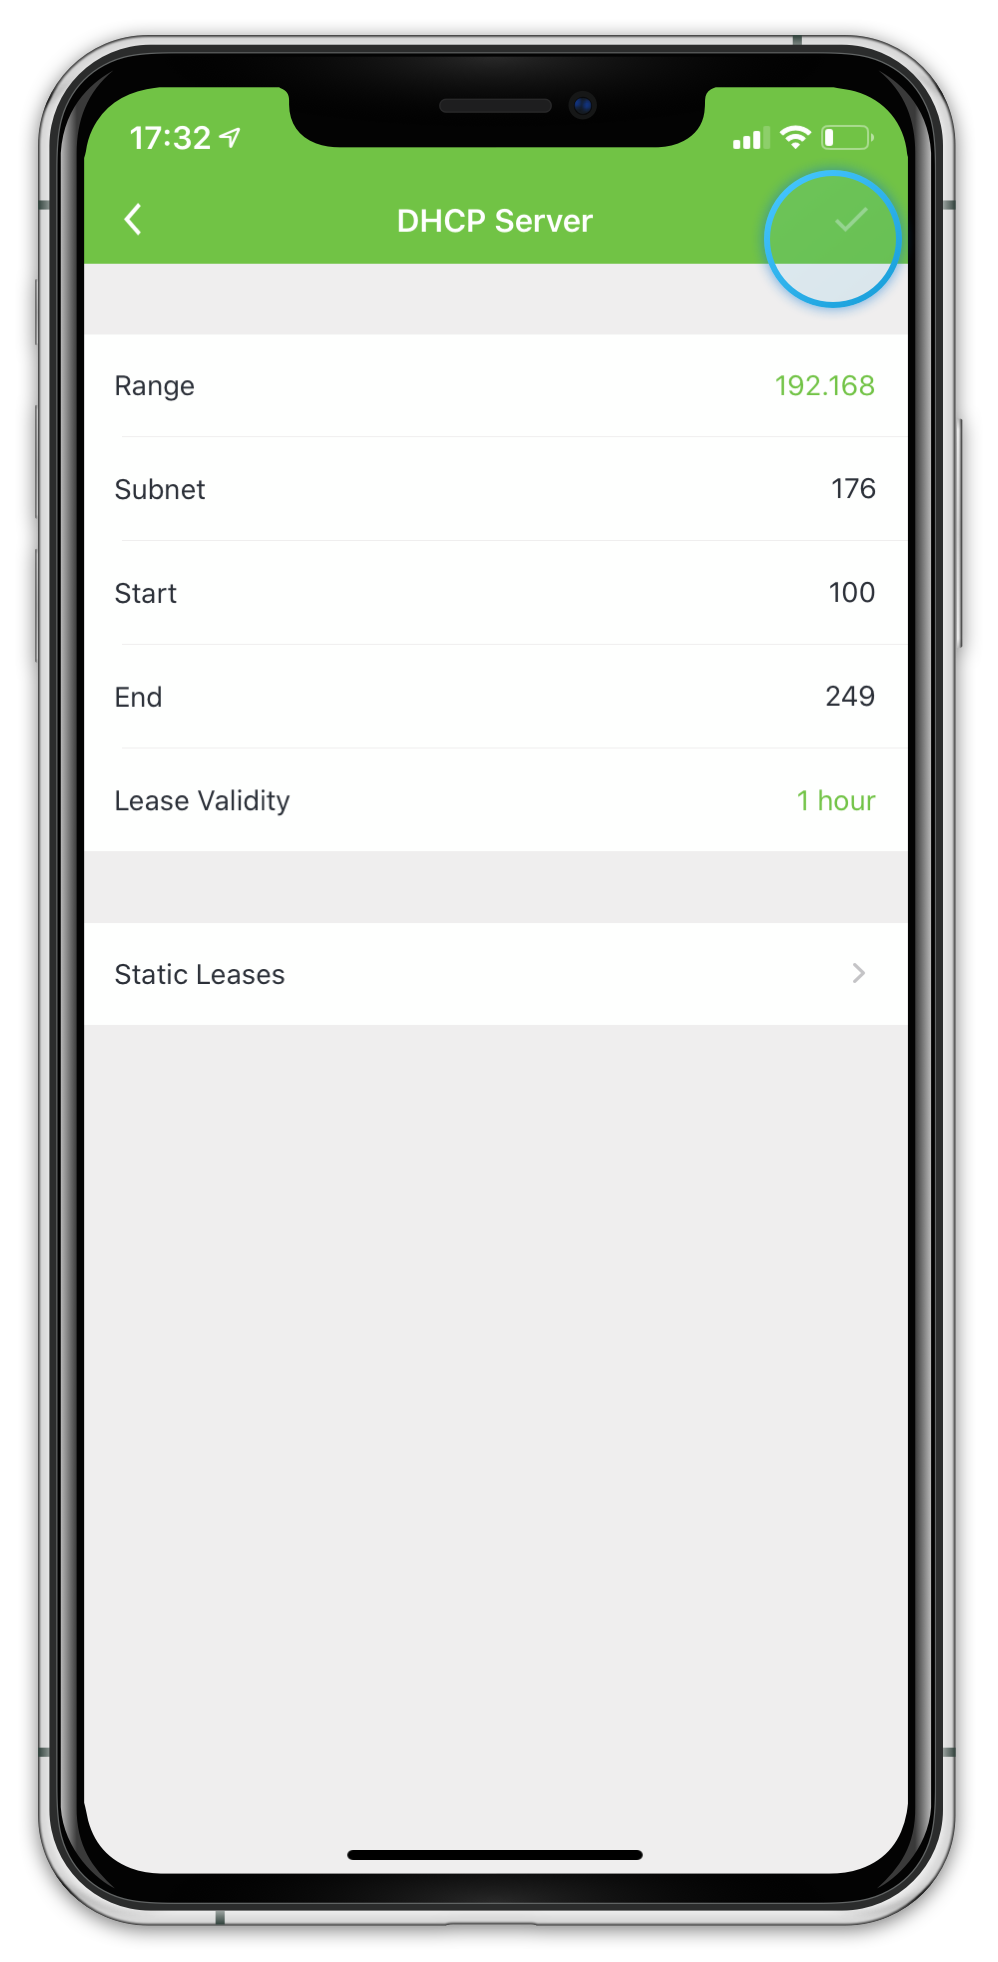
5. Tap ✓ to save your settings.
How to Change the Router's IP Address (LAN)
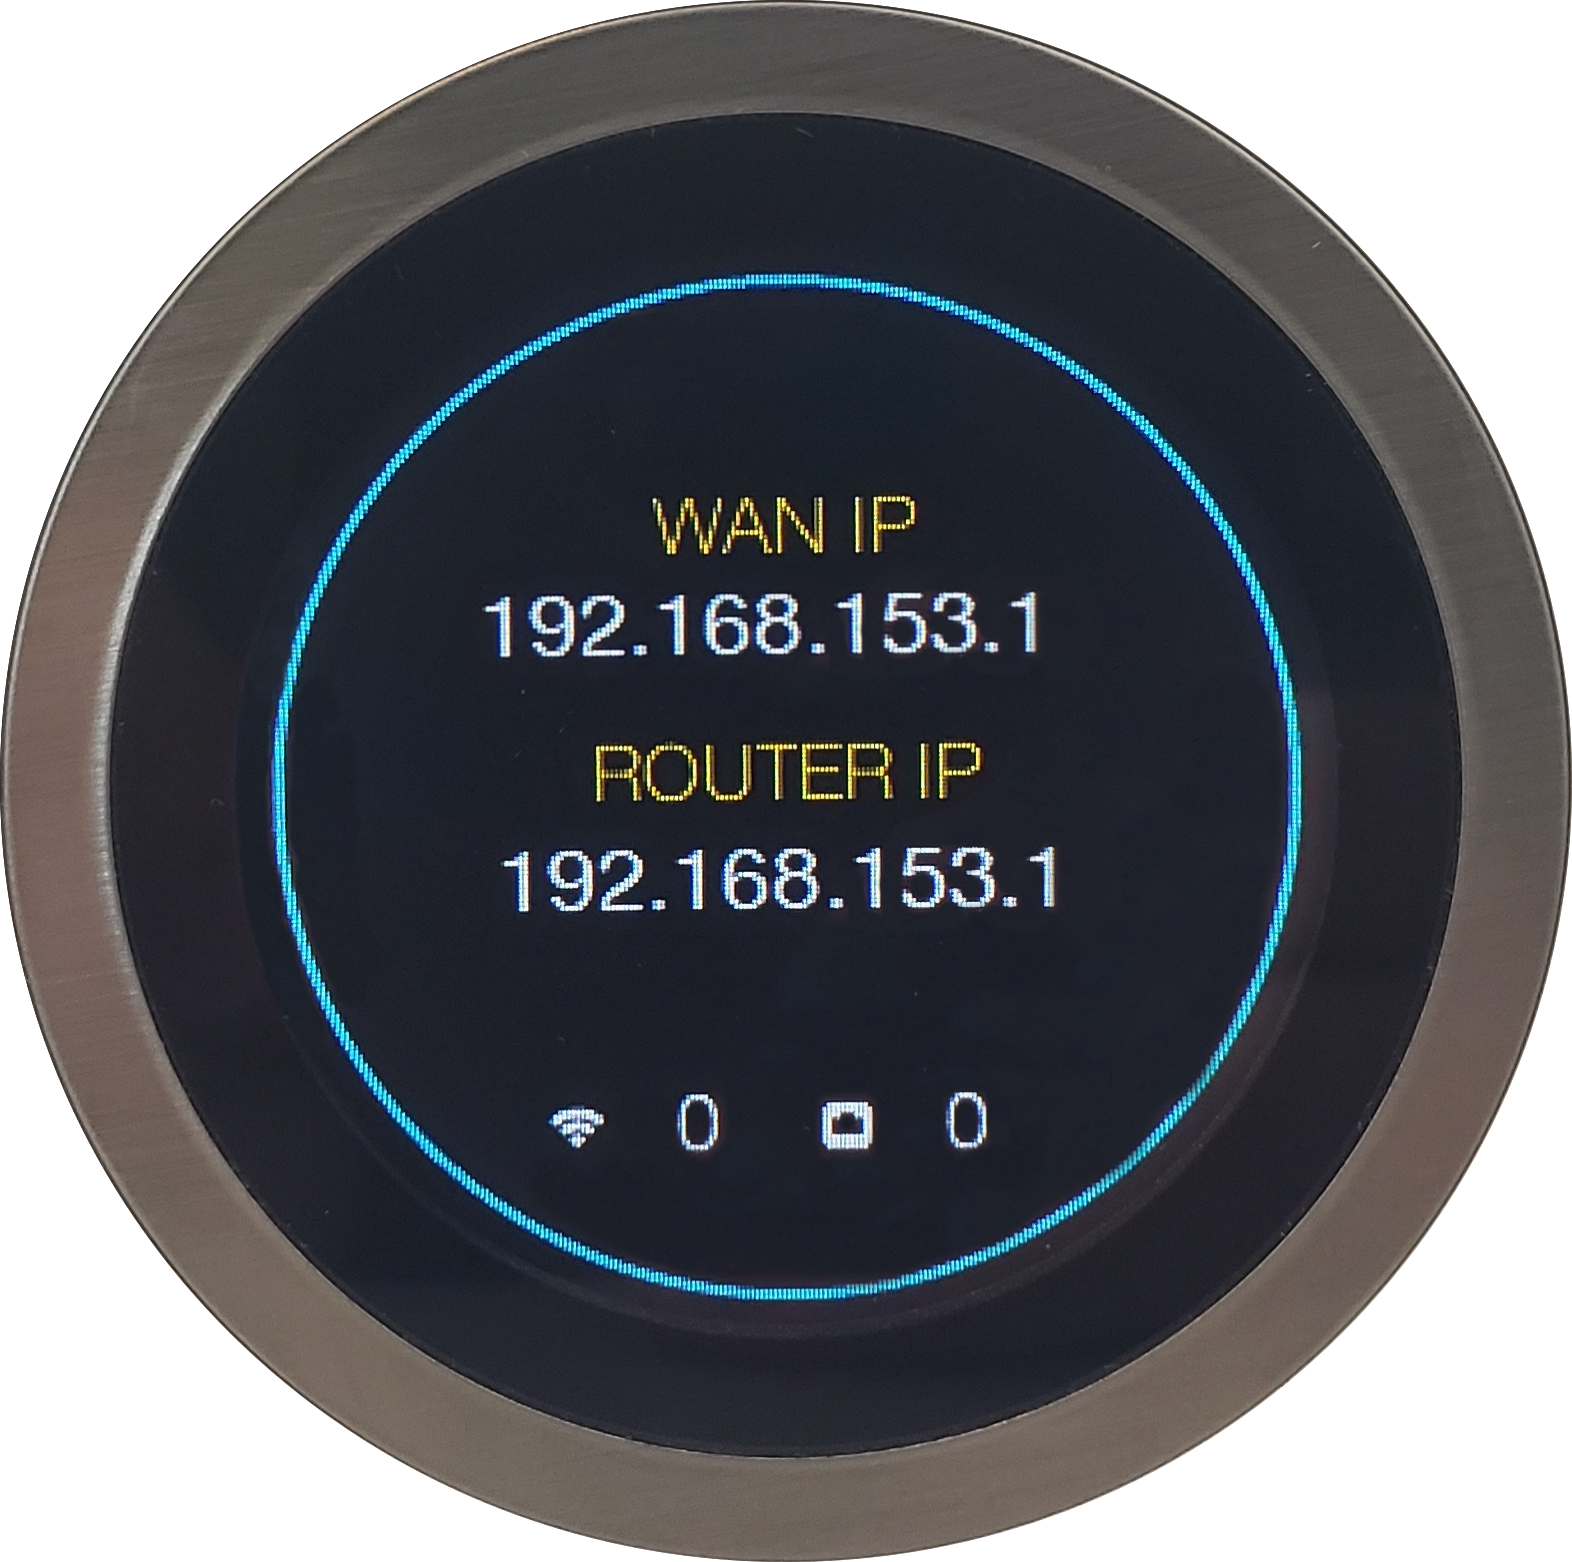
The router's IP Address can be changed by modifying the DHCP IP range. By default, the router will auto-assign itself a 192.168.X.1 IP address. In the example above, where the range is 192.168 and the subnet is 153, the router's IP address will be 192.168.153.1.
Tip: To find the routers IP address tap on the LCD screen of the router until the IP information is displayed.
Troubleshooting: Client Devices with IP Address Issues
Sample Issue: Client device (such as a laptop) displays a message saying another device is using the same IP Address.
If a client device has a static IP configuration that does not match AmpliFi's DHCP range, or there is another device sharing the same address there will be IP conflicts. Another common issue is that the IP range is not large enough to provide addresses to all the devices attempting to connect. Two solutions to attempt:
1. Edit the DHCP range as described in the steps above and make the range larger, providing more IP addresses. Adjust the Start and End fields to have a larger range.
2. Edit the client device's settings to remove any static IP or manual IP input and allow AmpliFi to assign the device a new one. Or, if a static IP must be assigned for this device, do so from the AmpliFi app by following the instructions in this article: Creating a Static Lease. Please clear the configuration made in the client device first, or adjust it accordingly to not cause conflict with the configuration you are attempting on AmpliFi. If you do not know how to edit your client device's settings, please consult their support documentation or contact their support team.